Make fall fun with these easy-to-make Rice Krispie Pumpkins! These no-bake treats are incredibly cute and perfect for kids to make—and eat too! Ideal for Halloween parties, school events, or autumn gatherings, these delightful pumpkin-shaped snacks will surely impress everyone. With their vibrant color and playful appearance, Rice Krispie Pumpkins stand out as a fun treat that combines simplicity with a touch of creativity.
Why You’ll Love This Recipe
- Easy to Make: Even novice bakers can whip up these treats in no time!
- No-Bake Fun: Skip the oven! This recipe requires only a few minutes on the stovetop.
- Customizable Color: Adjust the orange gel coloring for the perfect pumpkin hue.
- Kid-Friendly Activity: Perfect for involving children in the kitchen; they’ll love shaping their pumpkins!
- Deliciously Sweet: The combination of marshmallows and cereal creates a sweet, chewy texture that everyone loves.
Tools and Preparation
To create your Rice Krispie Pumpkins, you’ll need some essential tools that make the process smooth and enjoyable.
Essential Tools and Equipment
- Large pot
- Mixing spoon
- Non-stick spray
- Baking sheet (optional)
Importance of Each Tool
- Large pot: A spacious pot allows you to melt butter and marshmallows without spilling.
- Mixing spoon: A sturdy spoon is essential for thoroughly combining ingredients without breaking the cereal.
Ingredients
Make fall fun with these easy-to-make Pumpkin Rice Krispy Treats! These no-bake treats are so cute and kids love to make them—and eat them too!
For the Treats
- 6 cups Rice Krispies Cereal
- 6 cups Miniature vegan marshmallows
- 3 tablespoons Unsalted Butter
- Orange Gel Food Coloring
For Decoration
- 10 Tootsie Roll Candies
- 10 Green M&M Candies
How to Make Rice Krispie Pumpkins
Step 1: Melt the Butter
In a large pot, melt the butter over medium heat until it’s fully liquefied.
Step 2: Add Marshmallows
Once the butter is melted, add in the miniature vegan marshmallows. Cook over medium heat, stirring frequently until all marshmallows are completely melted.
Step 3: Color Your Mixture
Remove from heat and stir in ½ teaspoon of orange gel food coloring. Mix well until the color is evenly distributed. Feel free to add more coloring to achieve your desired pumpkin shade.
Step 4: Combine with Rice Krispies
Add the Rice Krispies cereal into the melted mixture. Stir gently until all cereal is well coated with marshmallow mix and color is uniformly applied.
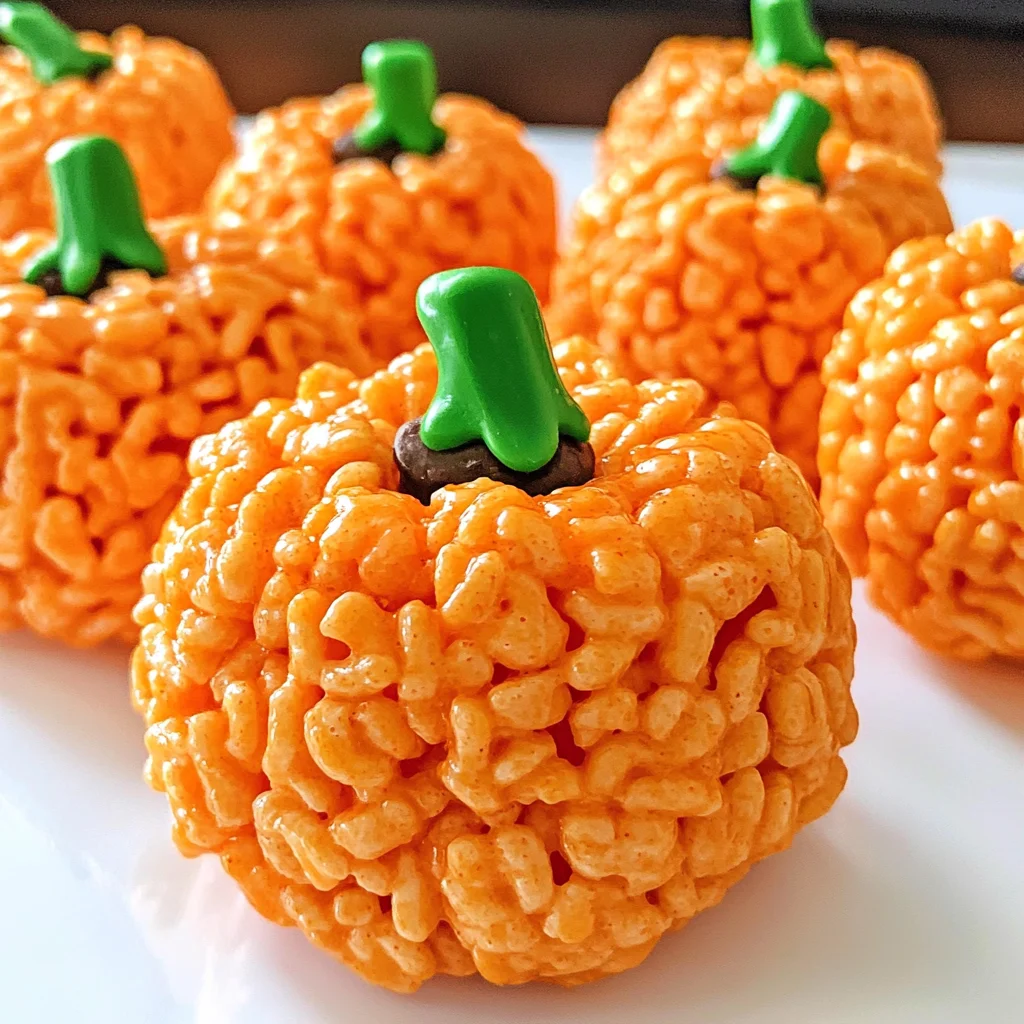
Step 5: Form Pumpkin Shapes
Spray your hands with non-stick spray. Take portions of the mixture and form them into large balls—aim for about 10 pumpkins total.
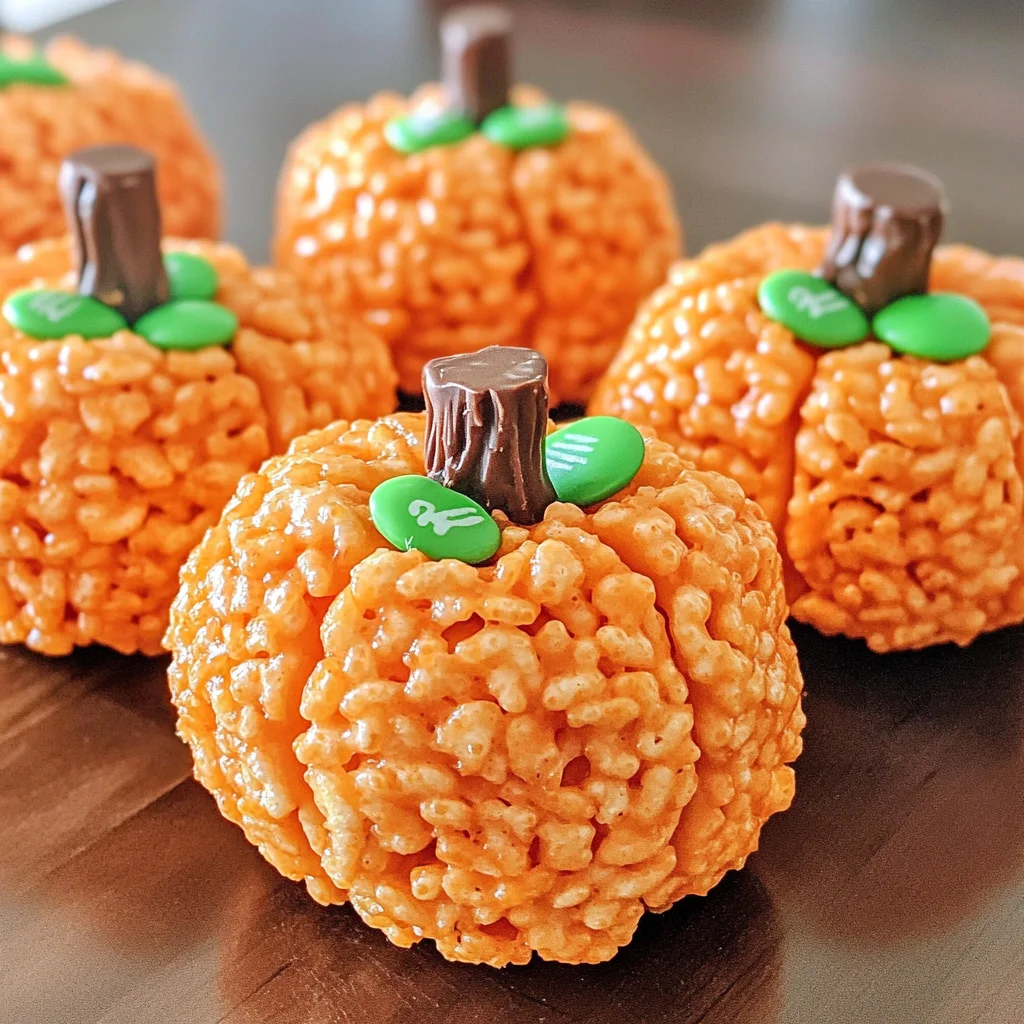
Step 6: Add Decorations
Insert a Tootsie Roll candy into each pumpkin ball as a “stump.” Then place a green M&M on top to represent the “leaf.”
Step 7: Set Time
Allow your adorable Rice Krispie Pumpkins to set for about an hour before serving. Enjoy your festive treats!
How to Serve Rice Krispie Pumpkins
These adorable Pumpkin Rice Krispie Treats are perfect for any fall gathering. They not only look festive but also taste great! Here are some fun serving suggestions to make your treats shine.
For Halloween Parties
- Dress up your serving platter with spooky decorations to complement the pumpkin theme.
- Arrange the treats in a circle to create a pumpkin patch display.
As Classroom Treats
- Package each treat in clear cellophane bags tied with orange ribbons for a fun, shareable treat.
- Include a small note card with ingredients for parents’ peace of mind.
During Movie Nights
- Serve these treats alongside popcorn and candy for a cozy movie night snack.
- Create a themed movie night with pumpkin or Halloween-themed films.
At Family Gatherings
- Place the Pumpkin Rice Krispie Treats on a large table with other fall desserts.
- Encourage kids to help serve by letting them pick their favorite pumpkin treat.
How to Perfect Rice Krispie Pumpkins
Creating the perfect Rice Krispie Pumpkins is easy with a few helpful tips. Follow these suggestions to elevate your treats!
- Use Fresh Ingredients: Ensure your marshmallows and butter are fresh for the best texture and flavor.
- Adjust Coloring Gradually: Start with a small amount of orange gel food coloring and add more as needed to achieve your desired shade.
- Coat Your Hands: Lightly spraying your hands with non-stick spray will prevent the mixture from sticking while you shape the pumpkins.
- Allow Adequate Setting Time: Letting your treats set for an hour helps them hold their shape when served.
- Experiment with Shapes: Consider making smaller pumpkins or using cookie cutters for different sizes and styles.
Best Side Dishes for Rice Krispie Pumpkins
Pairing side dishes with your Rice Krispie Pumpkins can enhance the festive atmosphere. Here are some delicious options that complement their sweetness beautifully.
- Apple Slices: Fresh apple slices provide a crisp, refreshing contrast to the sweet treats.
- Pumpkin Soup: A warm, savory pumpkin soup adds a comforting touch to your dessert spread.
- Carrot Sticks and Hummus: Crunchy carrot sticks paired with creamy hummus create a healthy, colorful side option.
- Cheese Platter: A selection of cheeses offers a savory balance to the sweetness of the Rice Krispie treats.
- Crispy Potato Wedges: Seasoned potato wedges add heartiness and pair well with sweet flavors.
- Popcorn Mix: Combine popcorn with nuts and dried fruits for a fun and crunchy side dish that appeals to all ages.
- Celery Sticks with Nut Butter: Nut butter-filled celery offers protein and crunch, balancing out the sugary treats.
- Mini Cornbread Muffins: These slightly sweet muffins provide warmth and comfort while complementing the fall theme.
Common Mistakes to Avoid
Making Rice Krispie Pumpkins can be a fun activity, but there are some common mistakes to watch out for.
- Boldly skipping the butter: Not using enough butter can lead to dry treats. Make sure to melt the right amount of butter to keep everything sticky and cohesive.
- Boldly ignoring the marshmallow melting process: Overheating marshmallows can make them hard. Keep the heat on medium and stir frequently until melted for a smooth mixture.
- Boldly rushing the cooling time: Don’t skip allowing your treats to set. Give them at least an hour to firm up properly before serving or decorating.
- Boldly forgetting non-stick spray: Forming the pumpkin shapes without spraying your hands can get messy. Use non-stick spray to easily mold your treats without sticking.
- Boldly underestimating coloring: Adding too little food coloring may result in pale pumpkins. Start with a small amount and adjust until you achieve your desired orange hue.
Storage & Reheating Instructions
Refrigerator Storage
- Store in an airtight container for up to 5 days.
- Keep them in a cool, dry place away from direct sunlight.
Freezing Rice Krispie Pumpkins
- Wrap each pumpkin tightly in plastic wrap before placing them in a freezer-safe bag.
- They can be frozen for up to 3 months.
Reheating Rice Krispie Pumpkins
- Oven: Preheat to 250°F (120°C) and warm for about 10 minutes. This helps soften them without making them too hard.
- Microwave: Heat for about 10-15 seconds per pumpkin. Monitor closely to avoid melting completely.
- Stovetop: Place in a covered pan over low heat, stirring occasionally until warmed through.
Frequently Asked Questions
Here are some frequently asked questions about Rice Krispie Pumpkins that can help enhance your baking experience.
How do I make Rice Krispie Pumpkins more colorful?
You can add more orange gel food coloring while mixing if you want brighter pumpkins. Just stir gradually until you reach your preferred shade.
Can I use different cereal types for Rice Krispie Pumpkins?
Yes! You can experiment with different cereals like Cocoa Krispies or Fruity Pebbles for unique flavors and colors.
How do I store leftover Rice Krispie Pumpkins?
Store any leftovers in an airtight container at room temperature for up to five days or freeze for longer preservation.
Can I customize the decorations on my Rice Krispie Pumpkins?
Absolutely! Feel free to use chocolate candies, sprinkles, or even edible glitter to decorate your pumpkins as you like.
What is the best way to serve Rice Krispie Pumpkins?
These treats are perfect for parties, Halloween gatherings, or as fun snacks. Display them on a festive platter for added appeal!
Final Thoughts
Rice Krispie Pumpkins are not only adorable but also versatile and easy to make. This recipe offers plenty of room for customization, allowing you to create unique designs that fit any occasion. Gather your ingredients and have fun making these delightful treats!

Rice Krispie Pumpkins
- Total Time: 20 minutes
- Yield: Approximately 10 servings 1x
Description
Create a festive atmosphere this fall with delightful Rice Krispie Pumpkins! These no-bake treats are not only cute but also incredibly fun for kids to make and enjoy. Perfect for Halloween parties, school events, or cozy family gatherings, these pumpkin-shaped snacks feature a sweet combination of vegan marshmallows and cereal, creating a chewy texture that’s sure to please everyone. With their vibrant colors and playful designs, these Rice Krispie Pumpkins are a hit for both children and adults alike. Gather your ingredients and let the creativity flow as you shape these adorable treats into a charming autumn display!
Ingredients
- 6 cups Rice Krispies Cereal
- 6 cups Miniature vegan marshmallows
- 3 tablespoons Unsalted Butter
- Orange Gel Food Coloring
- Tootsie Roll Candies (for decoration)
- Green M&M Candies (for decoration)
Instructions
- Melt the butter in a large pot over medium heat until fully liquefied.
- Add the miniature vegan marshmallows and stir frequently until melted.
- Remove from heat, stir in ½ teaspoon of orange gel food coloring until evenly mixed.
- Fold in the Rice Krispies cereal until thoroughly coated with the marshmallow mixture.
- Spray hands with non-stick spray and shape mixture into about 10 pumpkin balls.
- Insert a Tootsie Roll into each ball as a stump and place an M&M on top as a leaf.
- Allow to set for an hour before serving.
- Prep Time: 15 minutes
- Cook Time: 5 minutes
- Category: Dessert
- Method: No-Bake
- Cuisine: American
Nutrition
- Serving Size: 1 serving
- Calories: 150
- Sugar: 15g
- Sodium: 50mg
- Fat: 4g
- Saturated Fat: 2g
- Unsaturated Fat: 2g
- Trans Fat: 0g
- Carbohydrates: 27g
- Fiber: 0g
- Protein: 1g
- Cholesterol: 5mg