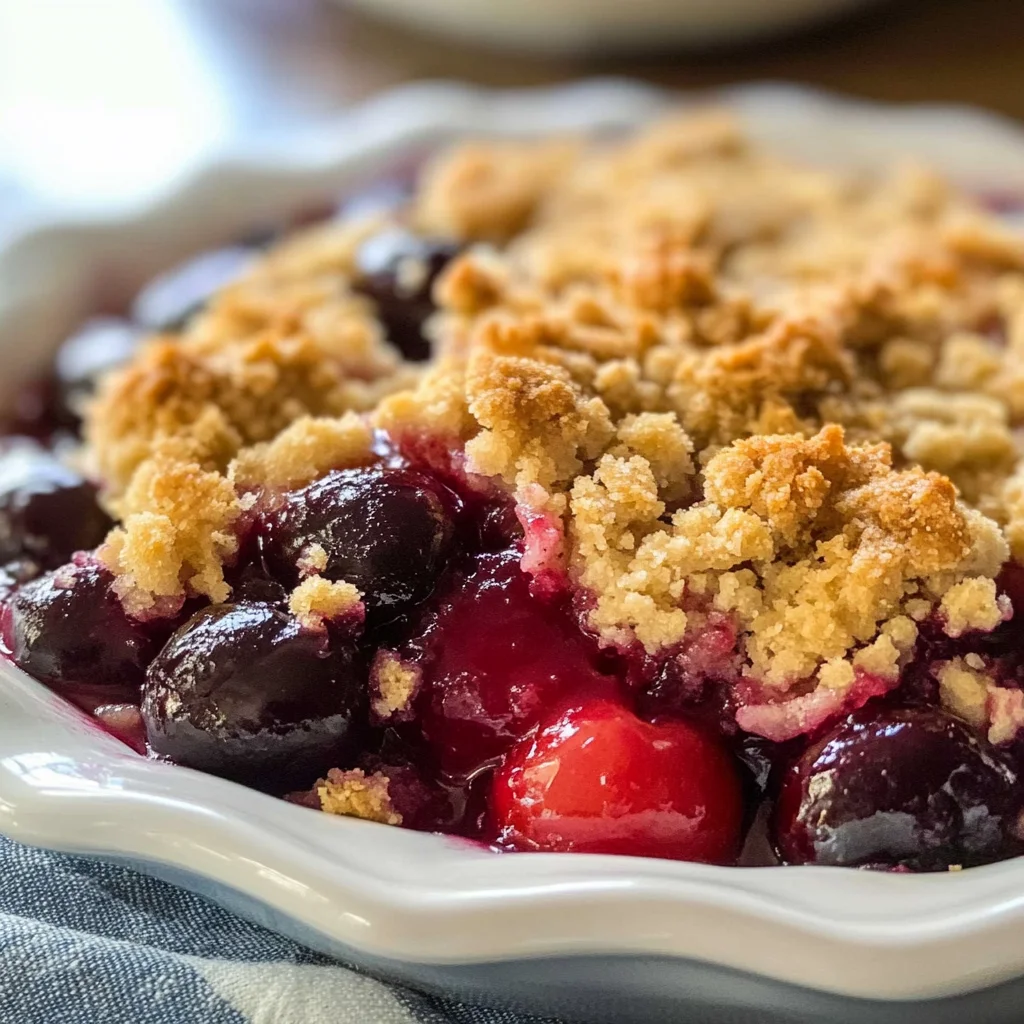
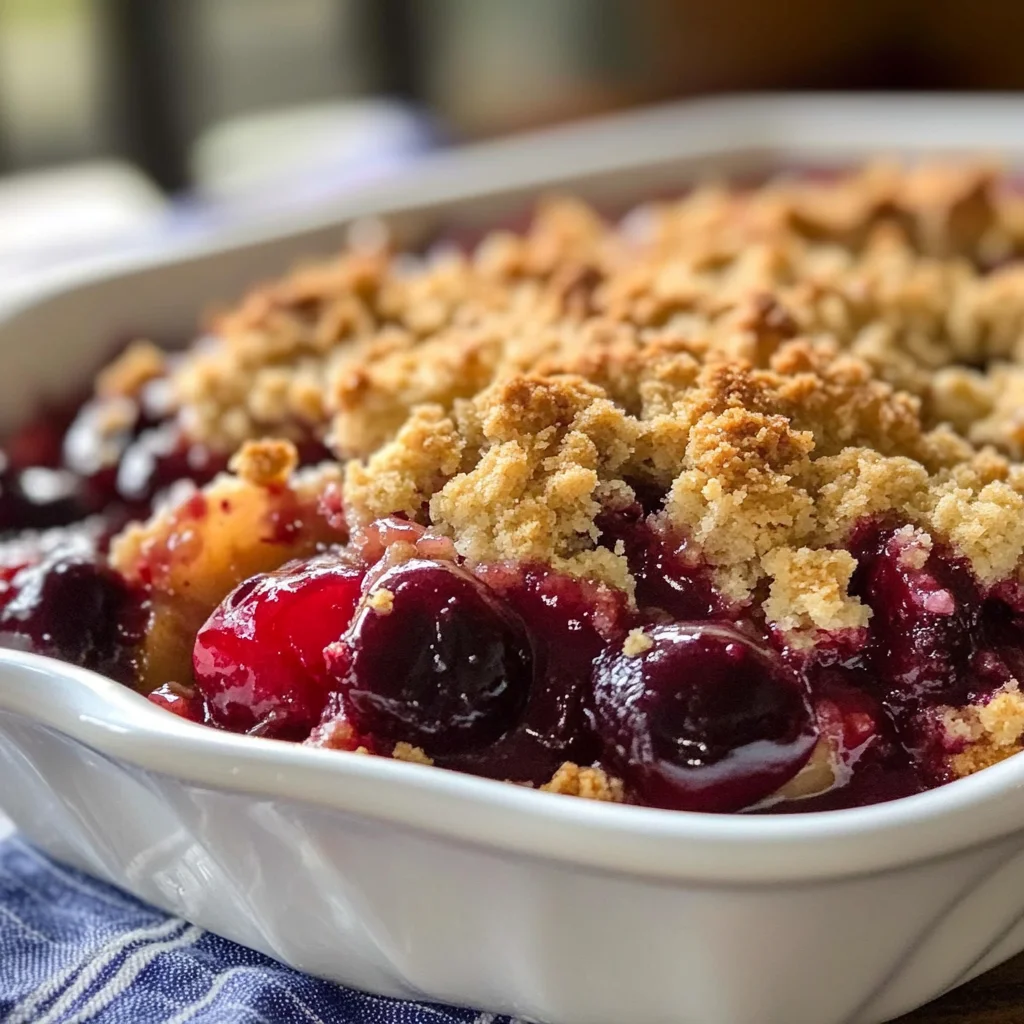
Old Fashioned Cherry Crisp is a delightful dessert that brings together the sweet and tart flavors of cherries with a crunchy topping. This recipe is perfect for any occasion, whether you’re celebrating a special event or simply enjoying a cozy night at home. With its simple ingredients and easy preparation, you’ll find yourself making this cherry crisp throughout the year, using either fresh or frozen cherries.
Why You’ll Love This Recipe
- Quick Preparation: With only 5 minutes of prep time, you can whip up this delicious dessert in no time.
- Versatile Ingredients: Use fresh cherries in summer or frozen ones in winter; this recipe works perfectly year-round.
- Family-Friendly: Everyone loves a good cherry crisp! It’s a hit with kids and adults alike, making it great for gatherings.
- Easily Customizable: Add nuts or spices to the topping for an extra layer of flavor if desired.
- Serve with Style: Pair it with ice cream or whipped cream for a decadent treat that elevates your dessert game.
Tools and Preparation
To make Old Fashioned Cherry Crisp, you will need some essential tools to ensure a smooth cooking process. Having the right equipment makes baking easier and more enjoyable.
Essential Tools and Equipment
- 13×9 baking pan
- Mixing bowl
- Whisk or mixer
- Measuring cups and spoons
Importance of Each Tool
- 13×9 baking pan: This size is perfect for even baking and allows ample room for the cherry filling.
- Mixing bowl: A large mixing bowl helps combine all ingredients efficiently without making a mess.
- Whisk or mixer: These tools make it easy to achieve the crumbled mixture needed for the topping quickly.
Ingredients
This cherry crisp uses simple ingredients to create a delicious dessert. Make this recipe any time of year with fresh or frozen cherries.
For the Filling
- 32 oz cherries (fresh or frozen)
For the Crumble Topping
- 1 cup all-purpose flour
- 1 cup sugar
- 1/2 cup rolled oats
- 1 tsp baking powder
- 1 tsp vanilla
- 1 large egg
- 1/3 cup butter
How to Make Old Fashioned Cherry Crisp
Step 1: Preheat the Oven
Preheat your oven to 400˚F. This ensures that your cherry crisp bakes evenly and achieves that perfect golden brown color.
Step 2: Prepare the Cherries
- Remove pits from fresh cherries if using them.
- If using frozen cherries, make sure they are fully thawed.
- Place the prepared cherries in a greased 13×9 baking pan.
Step 3: Make the Crumble Mixture
- In a mixing bowl, beat together the flour, sugar, oats, baking powder, egg, and vanilla.
- Continue mixing until it forms a crumbly texture.
Step 4: Assemble the Crisp
- Sprinkle the crumble mixture over the cherries.
- Make sure not to cover them completely; leave some breathing pockets for better texture.
Step 5: Add Butter and Bake
- Melt the butter and drizzle it over the top of the crumble mixture.
- Place in the preheated oven and bake for about 40 minutes until golden brown.
Step 6: Serve
- Once baked, let cool slightly before serving.
- Enjoy warm with a scoop of ice cream or whipped cream if desired!
How to Serve Old Fashioned Cherry Crisp
Old Fashioned Cherry Crisp is a delightful dessert that can be enjoyed in various ways. Here are some suggestions to elevate your serving experience.
Pair with Ice Cream
- Vanilla Ice Cream: The classic pairing that adds creaminess and balances the tartness of the cherries.
- Chocolate Ice Cream: For a rich twist, chocolate ice cream complements the cherry flavors beautifully.
Add Whipped Cream
- Homemade Whipped Cream: Light and fluffy, homemade whipped cream enhances the dessert’s overall texture.
- Flavored Whipped Cream: Try adding vanilla or almond extract for a unique flavor boost.
Drizzle with Sauce
- Chocolate Sauce: A warm drizzle of chocolate sauce can add an indulgent touch to each bite.
- Caramel Sauce: The sweetness of caramel pairs perfectly with the tart cherries, creating a delicious contrast.
Serve Warm or Cold
- Warm Serving: Enjoying the crisp warm from the oven makes it especially comforting.
- Cold Serving: Refrigerated leftovers also taste great and can be refreshing on hot days.
Garnish with Nuts
- Chopped Pecans: Sprinkle chopped pecans for added crunch and a nutty flavor.
- Sliced Almonds: Toasted sliced almonds make for a delicious topping that adds texture.
How to Perfect Old Fashioned Cherry Crisp
To ensure your Old Fashioned Cherry Crisp turns out wonderfully every time, consider these helpful tips.
- Use Fresh Cherries: If possible, opt for fresh cherries as they provide better flavor compared to frozen ones.
- Don’t Overmix: When combining ingredients, mix just until combined to keep the topping crumbly and light.
- Adjust Sugar Levels: Taste your cherries; if they’re very sweet, you may want to reduce the sugar in the topping slightly.
- Add Spices: Consider adding cinnamon or nutmeg to enhance flavors and give your crisp a cozy autumn vibe.
- Monitor Baking Time: Keep an eye on your crisp towards the end of baking; it should be bubbly and golden brown.
- Let it Cool: Allowing it to cool for a few minutes before serving helps it set up nicely.
Best Side Dishes for Old Fashioned Cherry Crisp
Old Fashioned Cherry Crisp pairs well with several side dishes that can complement its flavors. Here are some great options to consider.
- Grilled Peaches: Sweet, caramelized peaches bring out fruity notes that complement cherry crisp nicely.
- Cheese Plate: A selection of cheeses like Brie or goat cheese provides richness and balances sweetness.
- Mixed Green Salad: A light salad dressed in vinaigrette offers a refreshing contrast to the dessert’s sweetness.
- Chocolate-Covered Strawberries: These treats add another layer of fruitiness and decadence while being easy to prepare.
- Fruit Sorbet: A light sorbet can cleanse the palate and enhance the fruit flavors in your dessert.
- Pecan Pie Bars: For those craving more sweetness, these bars provide an excellent nutty complement.
Common Mistakes to Avoid
Making an Old Fashioned Cherry Crisp can be simple, but there are common mistakes that can affect the final result. Here are some pitfalls to watch out for:
- Using unpitted cherries – Always remove pits from fresh cherries or ensure frozen cherries are properly thawed. This prevents an unpleasant surprise when enjoying your dessert.
- Not measuring ingredients accurately – Use precise measurements for flour, sugar, and oats. Incorrect amounts can alter the texture and sweetness of your cherry crisp.
- Overmixing the topping – Mix until crumbly, but avoid overmixing. Overworking the ingredients can lead to a dense topping instead of a light, crispy texture.
- Skipping the greasing step – Grease your baking dish properly. This ensures your cherry crisp doesn’t stick and makes serving much easier.
- Baking at the wrong temperature – Always preheat your oven to 400˚F before baking. This helps achieve a perfectly baked topping and ensures even cooking.
Storage & Reheating Instructions
Refrigerator Storage
- Store leftover cherry crisp in an airtight container.
- It will stay fresh in the refrigerator for up to 3 days.
Freezing Old Fashioned Cherry Crisp
- Wrap the cooled cherry crisp tightly in plastic wrap or aluminum foil.
- It can be frozen for up to 3 months for best quality.
Reheating Old Fashioned Cherry Crisp
- Oven – Preheat your oven to 350˚F and bake covered with foil for about 20 minutes or until heated through.
- Microwave – Heat individual servings on medium power for 30-60 seconds, checking frequently.
- Stovetop – Place a slice in a pan over low heat, cover, and warm it up gently for about 5-10 minutes.
Frequently Asked Questions
Here are some common questions about making Old Fashioned Cherry Crisp:
Can I use different fruits in my cherry crisp?
Yes! You can easily substitute other fruits like blueberries or peaches to create variations of this delightful dessert.
How do I make my Old Fashioned Cherry Crisp gluten-free?
To make this recipe gluten-free, use almond flour or a gluten-free all-purpose flour blend in place of regular flour.
Can I prepare the cherry crisp ahead of time?
Absolutely! You can prepare the topping ahead of time and store it separately. Just combine it with the cherries when you’re ready to bake.
What should I serve with Old Fashioned Cherry Crisp?
It pairs beautifully with vanilla ice cream or whipped cream, adding richness to this fruity dessert.
Final Thoughts
Old Fashioned Cherry Crisp is not only easy to make but also versatile enough for any season. Whether you use fresh or frozen cherries, this dessert brings warmth and nostalgia to your table. Feel free to customize it with nuts or spices for added flavor. Try making it today!

Old Fashioned Cherry Crisp
- Total Time: 45 minutes
- Yield: Serves approximately 8 people 1x
Description
Indulge in the comforting flavors of Old Fashioned Cherry Crisp, a delightful dessert that harmonizes sweet and tart cherries with a crunchy oat topping. This recipe is incredibly versatile; you can use fresh cherries in the summer or frozen ones during winter, making it a year-round favorite. With just five minutes of prep time, you can whip up this easy cherry crisp for family gatherings or cozy evenings at home. Serve it warm, topped with a scoop of vanilla ice cream or a dollop of whipped cream, to elevate your dessert experience. This nostalgic treat is sure to bring smiles to everyone at your table.
Ingredients
- 32 oz cherries (fresh or frozen)
- 1 cup all-purpose flour
- 1 cup sugar
- 1/2 cup rolled oats
- 1 tsp baking powder
- 1 tsp vanilla extract
- 1 large egg
- 1/3 cup butter
Instructions
- Preheat your oven to 400°F.
- Prepare the cherries by pitting fresh ones or thawing frozen ones, then place them in a greased 13″x9″ baking pan.
- In a mixing bowl, combine flour, sugar, oats, baking powder, egg, and vanilla until crumbly.
- Sprinkle the crumble mixture over the cherries, leaving some gaps for texture.
- Drizzle melted butter over the top and bake for about 40 minutes until golden brown.
- Let cool slightly before serving warm with ice cream or whipped cream.
- Prep Time: 5 minutes
- Cook Time: 40 minutes
- Category: Dessert
- Method: Baking
- Cuisine: American
Nutrition
- Serving Size: 1/8 of the pan (145g)
- Calories: 295
- Sugar: 22g
- Sodium: 150mg
- Fat: 10g
- Saturated Fat: 6g
- Unsaturated Fat: 4g
- Trans Fat: 0g
- Carbohydrates: 48g
- Fiber: 2g
- Protein: 4g
- Cholesterol: 50mg